Gravel over a membrane looks like the tidy, low-maintenance answer to a bare patch of ground — until the fabric rucks up, the weeds arrive anyway, and every downpour sits in a puddle on top. Most of what people blame on gravel actually comes down to the way the fabric beneath it was chosen and laid. Get these details right and the surface will stay put for years. Get them wrong and you'll be lifting pebbles to repair the mess underneath.
The frustrating part is that landscape fabric is not complicated. It is a separator and a weed suppressor, not a magic carpet. It cannot fix bad drainage, compacted soil, or a weed infestation that was already there. It also cannot do its job if it is too thin, exposed to sunlight, or covered with a scattering of pebbles so shallow that the first gust of wind moves them aside. Think of it as one layer in a system: preparation, fabric, aggregate, edge restraint, and maintenance. Weakness in any of those layers will show up at the surface.
Choosing the wrong type of fabric
The thin black sheeting sold as "weed membrane" in some DIY sheds is the biggest culprit. It's usually a cheap non-woven or a perforated film that tears as soon as you walk on it, breaks down in sunlight and holds water rather than letting it through. You can often recognise it by its price: if a roll costs less than a decent pair of gloves, it is not going to survive a wheelbarrow. Worse, some of it is sold folded tight, so it arrives creased. Those creases never flatten out under gravel; they become ridges that water follows.
What you want is a woven geotextile: a dense polypropylene fabric made for landscaping, around 100–150gsm for decorative gravel and heavier for paths or driveways. Woven fabric keeps its shape, drains freely and resists puncturing when a tonne of aggregate lands on it. It also has a predictable overlap direction and does not stretch into a sagging hammock when the ground settles. For a driveway or a heavily used path, look for 150–200gsm or a fabric specifically rated for vehicle traffic, and remember that the fabric is only separating the gravel from the sub-base. It is not replacing the sub-base.
Two materials to avoid altogether:
- Polythene sheeting or damp-proof membrane. It seals the ground, so water has nowhere to go and the area turns into a bog.
- Any fabric left uncovered through a hot summer. UV light makes cheap membrane brittle, and it will crumble in your hands by autumn.
There is also a middle ground that catches people out: non-woven geotextiles. These are excellent for drainage and separation under French drains, soakaways and paths, but they are not the best choice for weed suppression under decorative pebbles. Their needle-punched structure can allow fine dust and seeds to settle into the surface, and within a season or two you can have a green fuzz growing on top of the fabric rather than through it.
Laying fabric over weeds that are still alive
Fabric suppresses weeds. It doesn't kill established perennials. Couch grass, ground elder, bindweed and brambles will travel along the surface hunting for a gap, then push through any weakness at an overlap or edge. Horsetail will simply come up through the fabric as if it weren't there. These plants have stored energy in their roots, and a single layer of fabric is not enough to starve them. In fact, covering them can make things worse: the fabric traps moisture, creates a dark, humid environment, and the roots keep growing until they find an exit.
Clear the ground first. Dig out what you can, then either smother the area under a thick layer of cardboard or black polythene for a couple of months, or hoe off each flush of regrowth until the roots give up. On a site with heavy perennial weeds, a season of preparation saves years of fiddling about with a rake. If you are dealing with bindweed or ground elder, consider using a glyphosate-based weedkiller according to the manufacturer's instructions before laying fabric, or repeated cultivation if you prefer not to use chemicals. The key is to start with bare, weed-free soil, not a lawn that has been mowed short and covered over.
Annual weeds are a different problem. They can still germinate in the layer of dust, leaf litter and organic matter that accumulates on top of the gravel. That is why a fabric job can look immaculate for two years and then turn weedy after a nearby tree drops leaves. The fabric stopped the deep-rooted weeds, but the surface became a seedbed all on its own.
Overlaps, pegging and edges
Gaps between sheets are where most fabric jobs fail. Water running off one sheet gets under the next, lifting it and washing soil into the join until weeds have a toehold. A 50mm overlap might look generous when you are on your knees in the sun, but it is not enough once the fabric shifts under the weight of gravel. Think in terms of a hand's width, not a finger's width.
- Overlap adjacent sheets by at least 150mm, and 250mm or more on a slope.
- Lap in the direction water flows, so the upper sheet lies over the lower one. This sounds obvious, but it is easy to forget when you are working around a corner.
- Peg every metre or so, and closer along overlaps and edges. Plastic pegs with wide heads or galvanised staples both work. Avoid thin wire pegs that rust away in a season.
- Run the fabric past the edge of the pebbles and tuck it under the edging, kerb or paving. No fabric should be visible, and no pebbles should be able to escape. If the fabric stops at the edge of the gravel, it will fray, lift, and let weeds in from the border.
Leave the fabric slightly slack so it follows the contours of the ground, but not so loose that it folds into ridges under the gravel. Creases become channels for water and seed. A good test is to walk across the fabric before the gravel goes down. If it shifts under your feet, it needs more pegs. If it forms a wave in front of your boots, it needs to be pulled tighter. On very uneven ground, it is better to rake the soil level first than to rely on the fabric to hide lumps and hollows.
Using too little gravel or the wrong aggregate
The fabric is only half the system. The gravel on top has to be deep enough to stay put, block light and spread the load of foot traffic. For decorative beds, a minimum of 50mm is sensible; for paths, aim for 75–100mm; for driveways, the gravel should sit on a properly compacted sub-base with a separation fabric, not just a thin membrane over soil. If the gravel is too shallow, the fabric will show through, UV will attack it, and weeds will root in the dust that collects between the stones.
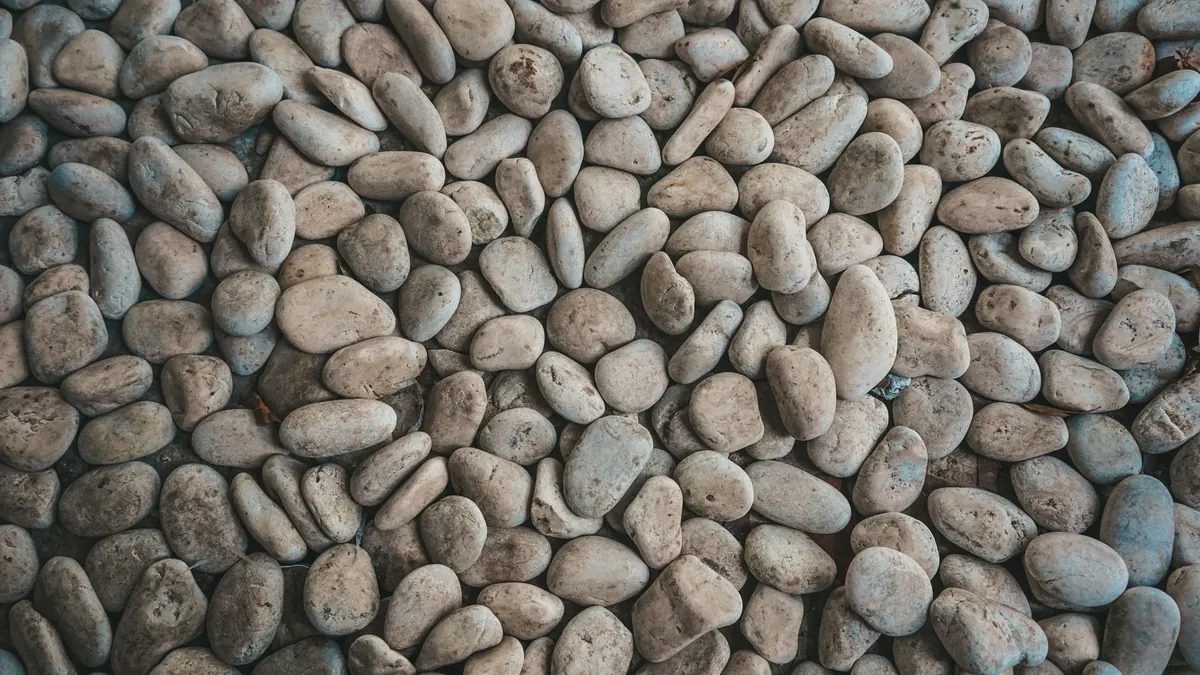
The type of gravel matters too. Rounded pea gravel looks lovely but behaves like ball bearings underfoot, especially on slopes and smooth paving. It migrates into borders, scatters onto paths and never quite stays where you put it. Angular gravel, such as 10–20mm crushed stone or slate, interlocks and stays put far better. If you are topping up an existing bed, match the size and colour of the original aggregate, or the new layer will simply sink into the old one and leave a patchy finish.
Ignoring drainage and slope
Landscape fabric is permeable, but it does not create drainage. If the ground beneath is compacted clay that already holds water, covering it with fabric and gravel will not solve the problem. Rain will still percolate slowly, and in a heavy storm the water may sit in the gravel until it can drain away. On a slope, water can run across the surface, under the fabric and out at the bottom edge, taking soil with it. That is why edging and a secure toe are so important on gradients.
Before laying anything, check where water goes in a downpour. If the area is a known puddle spot, consider a French drain, a soakaway or a channel drain before you bury it under stone. If the slope is steep, use a heavier woven geotextile, increase overlaps, and add check dams or planting pockets to slow the flow. Fabric laid over a wet, airless subsoil will eventually smell sour and support liverworts and moss on the surface, which is a sign that the whole system is too wet.
Planting through fabric without a plan
Many people lay fabric first and then decide to add shrubs, grasses or bulbs. That is the wrong order. Every hole you cut is a potential weak point. A sloppy X-cut around a shrub leaves flaps that curl up, and couch grass will find the gap before the shrub has even settled. If you want plants in a gravel area, plant them before the fabric goes down, or at least mark their positions and cut neat, tight holes. Fold the flaps back under the gravel, and keep the fabric snug around the stem. For bulbs and small perennials, it is often easier to leave planting pockets free of fabric and fill them with gravel after planting, rather than piercing the membrane in dozens of places.
Think about future maintenance too. If you may want to lift the gravel and change the layout later, do not peg the fabric so aggressively that it becomes a permanent fixture. A neat, accessible edge and a sensible overlap will make repairs much easier. And if the area is a vegetable bed or a border where you dig regularly, landscape fabric is the wrong tool altogether. It belongs under permanent gravel, paths and driveways, not under soil that is cultivated every season.
Expecting zero maintenance
Landscape fabric reduces weeds; it does not abolish them. The best-looking gravel areas are still swept, topped up and checked at the edges once or twice a year. Leaves and debris should be removed before they break down into a compost layer that weeds can root into. Gravel should be raked back into place where it has migrated. Edges should be inspected for gaps. If you do nothing, the system will still fail, just more slowly than it would without fabric.Photo: schauhi / Pixabay